CLOTHING

The very basics of how clothing works in Second Life is covered in this tutorial from the blog: Mermaid Diaries. Essentially, by using a body template made by Robin Wood, you use it as a guide to determine the cut of how you would like the outfit to look on your avatar.

Following the tutorial, I experimented with a an upper body one and virtually slabbed a color of black over it with the brush tool. Then, I used the pen tool to give the collar a rounded cut. Afterwards, you hide all the visible layers except for the front and back view of the color and save it as a transparent .png or .tga. From there, upload it (for 10 Linden dollars) onto your server.
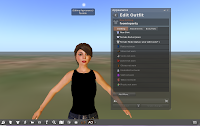
Now you want to edit your appearance to add you new creation. For Firestorm users, either right-click and edit outfit or go to Avatar > Outfit. From the gear icon  drop down menu, select "New Clothes" > "New Shirt". Then click on the fabric box and find your uploaded shirt under Textures in the Inventory folder
 drop down menu, select "New Clothes" > "New Shirt". Then click on the fabric box and find your uploaded shirt under Textures in the Inventory folder
and voila!

You can also edit certain areas of the outfit by clicking the 'edit outfit' icon  on the upper right of the 'appearance' menu. With this particular example I can really only edit the cut at the collar.
 on the upper right of the 'appearance' menu. With this particular example I can really only edit the cut at the collar.
TATTOOS
Tattoos work similarly as clothes. Following the Robin Wood template, I applied my desired design ("Jackknife Tattoo" designed by EA) and how I would like it to appear.


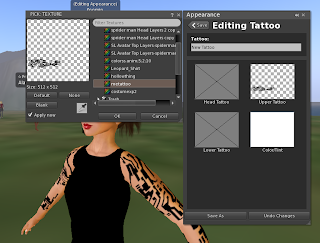
We also would save this as a transparent .png or .tga and upload it onto our server. From there, we click the "Go to additional options" icon > "New Clothes" > "New Tattoo". Click the "Upper Tattoo" box and select your uploaded image from under the "Textures" folder under "Inventory". And there you have it!
No comments:
Post a Comment